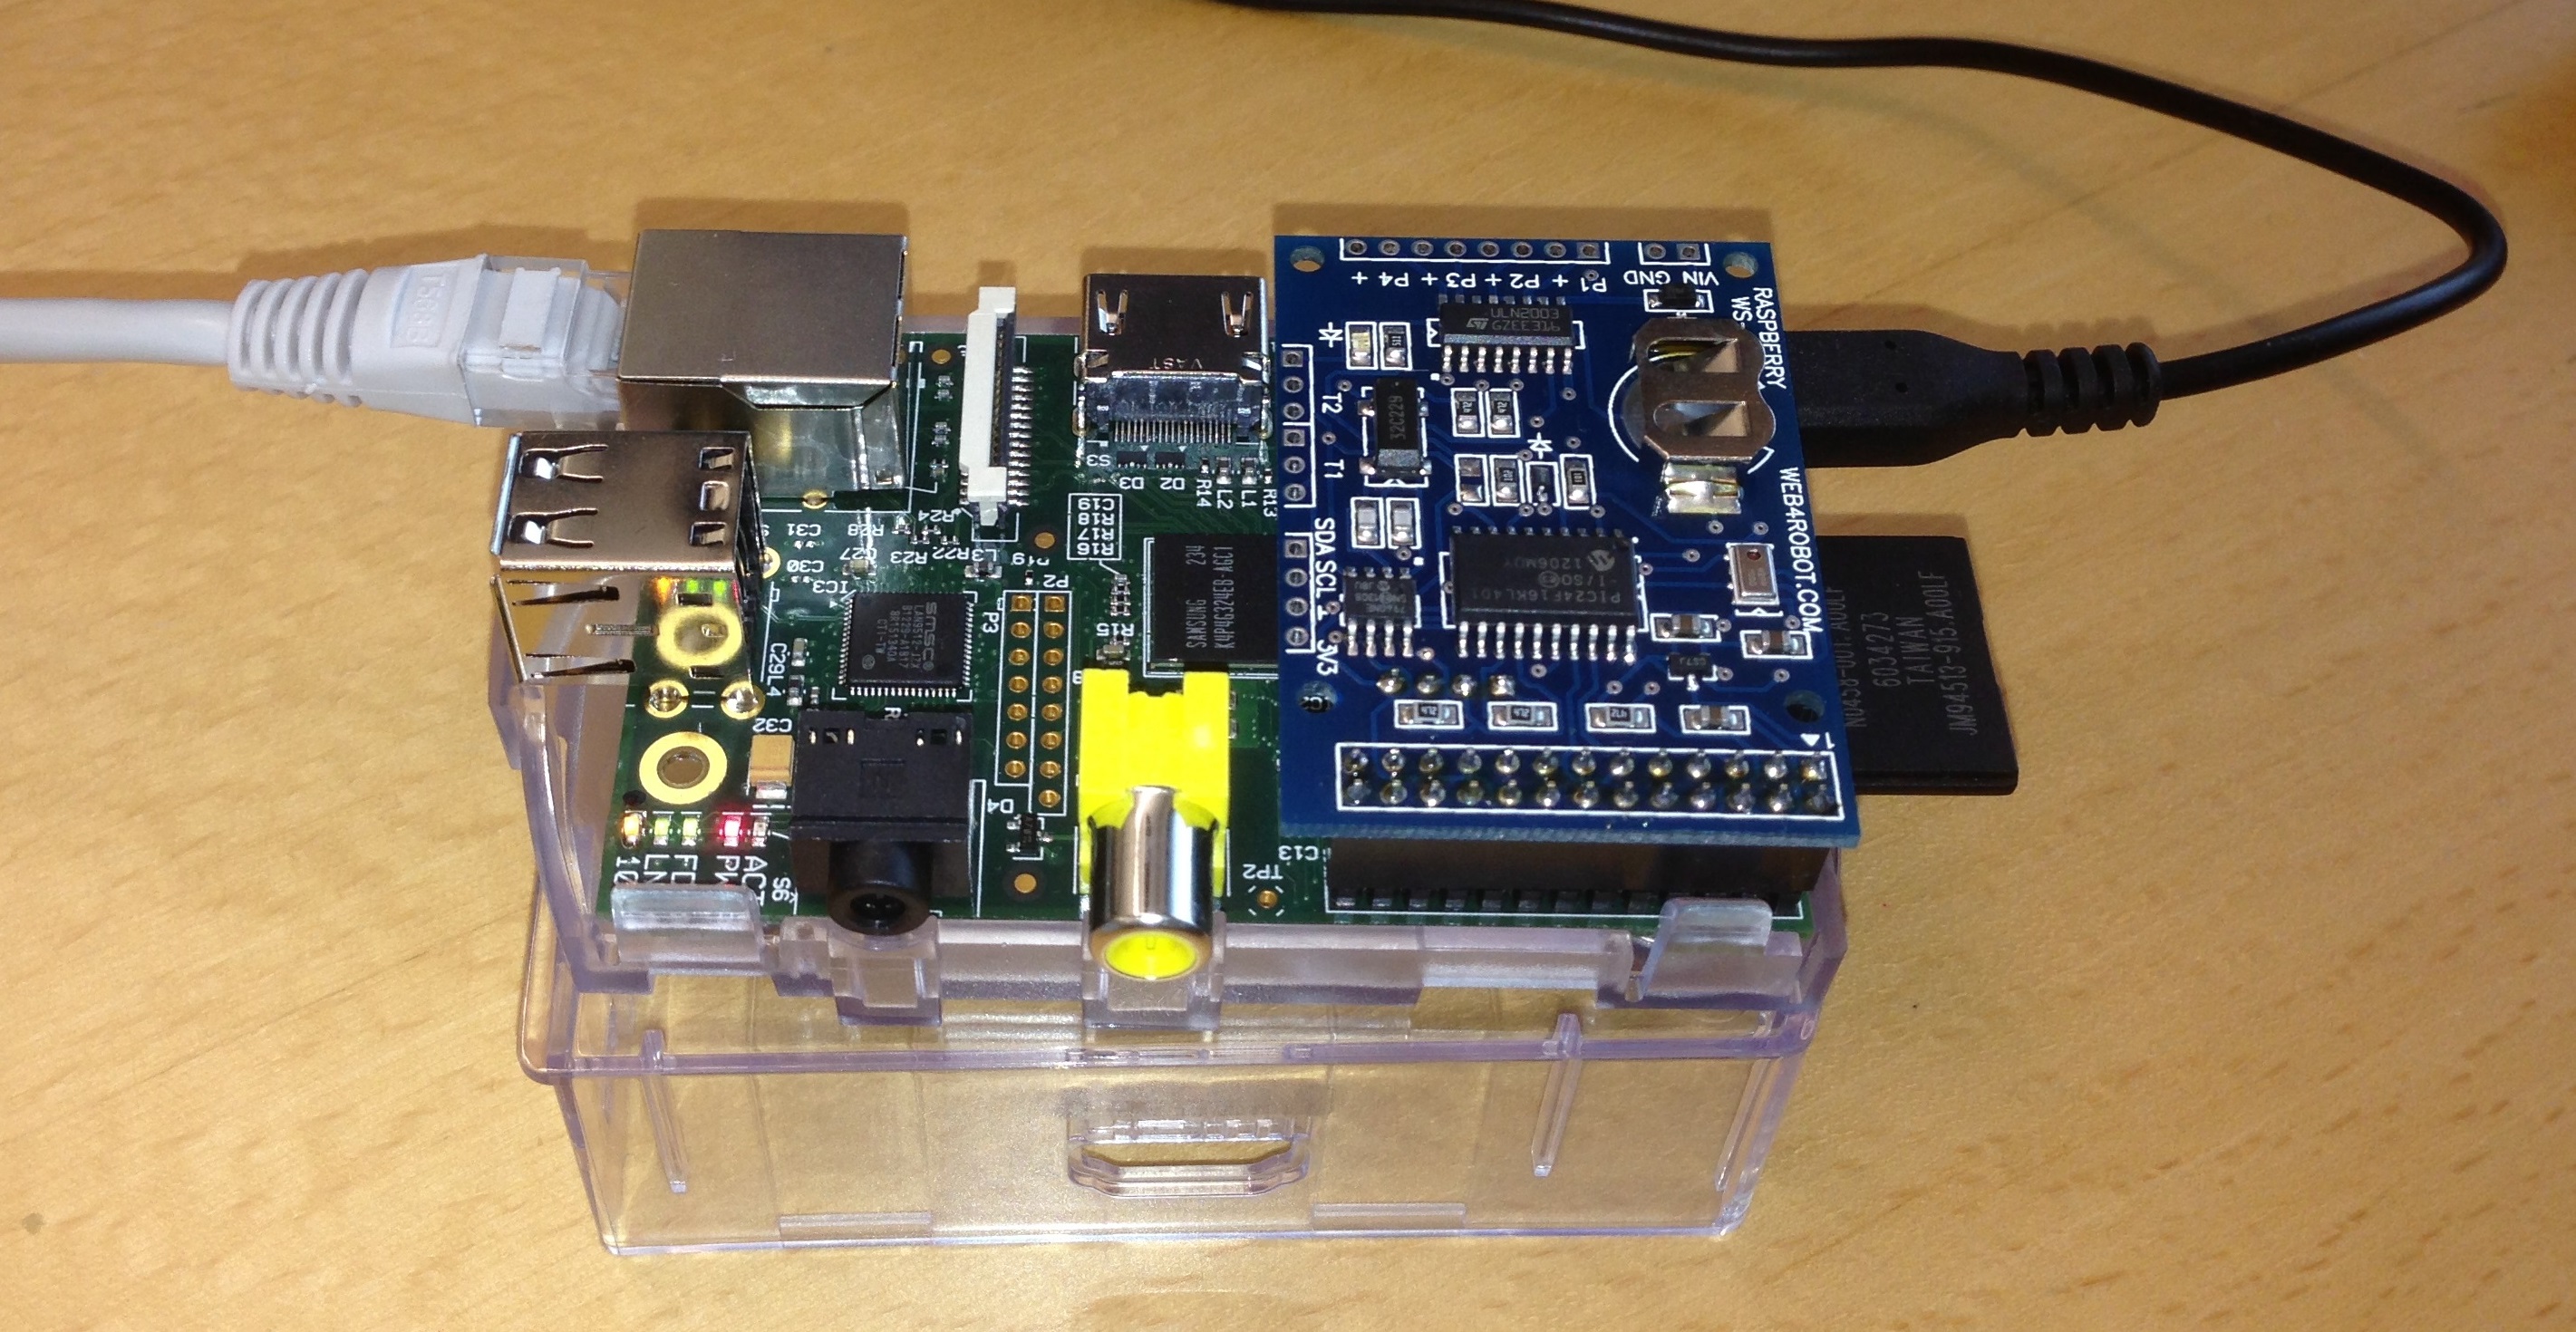
Raspberry Pi + Java SDK based OPC UA weather station
14.08.2013
We often get questions about developing to ARM platform using our Java SDK. This has been proven to be possible by our QEMU + ARM test setup. We decided that it would be nice to have also some demo running on real hardware.
About Raspberry Pi
Raspberry Pi is a small single-board computer that has ARM1176JZFS CPU (ARMv6 instruction set). It has 512MB of RAM (Model B rev2., A and rev1 have 256MB).
Demo Application
A PiWeather board is connected directly to the Pi (board has a socket to connect to Pi’s GPIO header). It has temperature, pressure and humidity sensors on the board, with option to add 2 external temperature sensors. It also has 4 High Power Outputs for device controlling. Combine that with our Java SDK to form a OPC UA based office weather station.

Starting up
A Raspbian “wheezy” image was flashed to the SD-card. Hard float version was selected at the time (soft-float would have been a better option here, notes for this later). I2C interface is not enabled by default, it was enabled using instructions in PiWeather board manual. The manual also had Python code examples for communicating with the sensor.
Installing Java
First a Java SE Embedded version 7 was tried, but then it was noticed that it requires the “soft-float” version of Raspbian. Instead of installing the soft-float version it was also noticed that the early access version of JDK 8 works on hard-float version (note also that it won’t work in soft-float version). Therefore JDK 8 Early Access was installed. SE 7 Embedded version with soft-float version of Raspbian should also work.
Communication to PiWeather board
Communication with PiWeather board is done using I2C. Pi4J library provides easy Java access to Pi’s pins and features and was used to get Java based I2C communication to work.
I2CBus bus = I2CFactory.getInstance(I2CBus.BUS_1);
I2CDevice board = bus.getDevice(0x4E);
byte[] buffer = new byte[1];
board.read(0x42, buffer, 0, 1);
Creating the OPC UA server
After the Java based communication was ready, the next step was to create the OPC UA server, which would read the sensor values periodically. Most of this is based on SampleConsoleServer demo that is included in our SDK packages.
Creating the AddressSpace
...
int ns = nodeManager.getNamespaceIndex();

final UaObject objectsFolder = server.getNodeManagerRoot().getObjectsFolder();

//WeatherStation folder
final NodeId weatherStationId = new NodeId(ns, "WeatherStation");
UaObject weatherStation = new UaObjectNode(nodeManager, weatherStationId, "Weather Station", nodeManager.getDefaultLocale());
objectsFolder.addReference(weatherStation, Identifiers.HasComponent, false);

UaType intType = server.getNodeManagerRoot().getType(Identifiers.Int32);
UaType doubleType = server.getNodeManagerRoot().getType(Identifiers.Double);

//Temperature variable
final NodeId internalTempId = new NodeId(ns, "InternalTemperature");
internalTemperature = new CacheVariable(nodeManager, internalTempId, "Internal Temperature", nodeManager.getDefaultLocale());
internalTemperature.setDataType(intType);
weatherStation.addComponent(internalTemperature);

// other variables e.g. humidity and pressure
...
Creating the .jar package
Although JDK8 as a JDK has a compiler, the jar-package is compiled in PC, because the demo is intended as if the Pi was running a JRE. The package is made in following steps: (right click to project) -> export -> Java/Runnable JAR file -> Copy required libraries into a sub-folder next to the generated JAR -> Finish
The generated .jar package is transferred to Pi (as I’m on windows, I used WinSCP).
Running the server
The server is started in screen (program that allows a program to continue running even after logout, since I used ssh to connect to the Pi). Starting the server takes quite long, about a minute.
Performance
The server uses about 50MB of RAM. Currently the PiWeather board is connected directly to the Pi. Because it is so close to the Pi, the heat from the Pi actually affects the temperature measurement.
Future updates
We’ll probably put some public address for the server and add some external temperature sensors (DS18B20).

Bjarne Boström
Software Engineer
Email: bjarne.bostrom@prosysopc.com
Expertise and responsibility areas: OPC UA product development and project work
Tags: Demo, Embedded, Java, OPC UA, Raspberry Pi
comments powered by DisqusAbout Prosys OPC Ltd
Prosys OPC is a leading provider of professional OPC software and services with over 20 years of experience in the field. OPC and OPC UA (Unified Architecture) are communications standards used especially by industrial and high-tech companies.
Newest blog posts
Why Do Standards Matter in Smart Manufacturing?
The blog post discusses the importance of standards in smart manufacturing, envisioning a future where auto-configurable systems in manufacturing rely on standardized data formats for seamless integration and reduced costs, with a focus on the OPC UA standard family as a key enabler.
OPC UA PubSub to Cloud via MQTT
Detailed overview of the demo presented at the OPC Foundation booth
SimServer How To #3: Simulate data changes on a server using an OPC UA client
A two-part step-by-step tutorial on how to write data changes on an OPC UA server using an OPC UA client.
